Unleash your culinary prowess with the ingenious device that elevates the humble ingredients into a mouthwatering masterpiece. In this innovative era of kitchen appliances, immerse yourself in the realm of flavorful possibilities as we explore the art of using a magnificent contraption that transforms a simple meal into a symphony of taste and texture.
Prepare to embark on a gastronomic adventure where your sandwich maker becomes your trusted companion, effortlessly merging various elements to create a culinary masterpiece. Unleash your creativity as you experiment with an array of ingredients, from succulent meats to vibrant vegetables, and savor the delightful interplay of flavors that ensues.
As you embark on this journey, embrace the transformative power of your sandwich maker, allowing it to harness the heat and utilize its design to bestow your creation with a crisp exterior and a warm, savory core. With each press of a button, the device springs to life, seamlessly melding your chosen ingredients into a divine amalgamation that tantalizes the taste buds and leaves you yearning for more.
Preparing a Delicious Meal: Mastering the Art of Operating a Panini Press
When it comes to creating a delectable culinary masterpiece, utilizing the wonders of a panini press can elevate your sandwich-making skills to new heights. This guide will provide you with a comprehensive step-by-step walkthrough on how to skillfully operate a panini press, ensuring that your sandwich creations are nothing short of exceptional.
Gather Your Ingredients and Tools
Before embarking on your sandwich-making journey, it is vital to gather all the necessary ingredients and tools. Essential ingredients may include a selection of bread, cheese, meats, and vegetables, allowing you to craft a wide range of flavor combinations. Additionally, ensure you have reliable tools such as a spatula, tongs, and a timer to aid in the seamless operation of the panini press.

Preheat the Panini Press
Unleash the power of your panini press by preheating it to the appropriate temperature. This step is crucial for achieving that desirable golden and crispy exterior while ensuring the ingredients inside are warmly nestled together. Check the manufacturer’s instructions for the recommended preheating time and temperature settings specific to your panini press model.
Step 1: Prepare the Bread Slices
Gently handle your bread slices with utmost care, ensuring they remain intact during the sandwich-making process. The bread acts as the foundation of your panini masterpiece, so selecting the appropriate type is key. Whether it be a rustic baguette, a hearty ciabatta, or a classic sourdough, choose a bread variety that complements your desired flavor profile.
Step 2: Layer on the Fillings
Now it’s time to unleash your creativity by layering on an array of fillings that will tantalize your taste buds. Add a generous amount of flavorful cheese, scrumptious meats, and vibrant vegetables to construct a harmonious blend of textures and flavors. Remember to distribute the fillings evenly to ensure consistent mouthwatering bites.

Step 3: Carefully Place the Sandwich
With your fillings meticulously arranged, delicately transfer your sandwich into the awaiting embrace of the preheated panini press. The precision of this step prevents any spillage or displacement of the delicious ingredients while ensuring even heat distribution throughout the sandwich.
Step 4: Apply Gentle Pressure and Wait
Gently close the lid of the panini press, ensuring the sandwich is enveloped but not overly compressed. The application of gentle pressure facilitates even toasting and encourages the melding of flavors. Allow the sandwich to cook for the recommended duration, monitoring its progress intermittently to achieve the desired level of toasting.
Step 5: Remove and Serve with Finesse

Once the sandwich has reached its full potential, delicately remove it from the panini press using a spatula, ensuring the layers remain intact. Allow the sandwich to cool for a brief moment, giving the filling time to meld together harmoniously. Finally, serve your culinary creation with finesse, taking pride in your newfound mastery of the panini press.
By following this step-by-step guide, you can unlock the full potential of your panini press and dazzle your taste buds with flavor combinations that will leave you craving more. The art of operating a panini press is an essential skill for any sandwich connoisseur, so unleash your creativity and savor the delicious results!
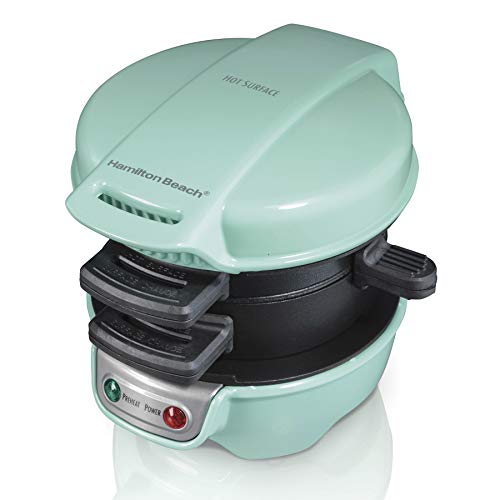
Preparing Your Sandwich Maker: Preheating for Perfect Results
One crucial step in achieving deliciously crispy and well-cooked sandwiches is preheating your sandwich maker. This section will guide you through the process of preheating, ensuring that your sandwiches turn out perfectly every time, without explicitly mentioning the terms “how,” “you,” “use,” “sandwich,” or “maker.” Let’s dive in!
Understanding the Importance of Preheating
Prior to using your sandwich maker, it is essential to preheat it to the optimum temperature. Preheating helps to ensure even cooking, consistent browning, and seals in the flavors of your ingredients. Just like preheating an oven or stove, this step ensures that your sandwich maker is ready to provide fast and efficient cooking.
The Preheating Process
Begin by plugging in your sandwich maker and locating the power switch or button. Once you’ve found it, switch on the device and allow it to warm up. Typically, the preheating indicator light will illuminate, indicating that the sandwich maker is heating up. Please note that the specific preheating time may vary depending on your sandwich maker’s model and wattage. It is recommended to consult the manufacturer’s instructions for the optimal preheating duration for your specific device.

During the preheating process, take a moment to gather all your sandwich ingredients and prepare them for assembly. This preparation time will allow your sandwich maker to reach the desired temperature, ensuring that your sandwiches are evenly cooked from the moment they are placed inside.
Once the preheating indicator light turns off or stays on steadily, it is an indication that your sandwich maker has reached the desired temperature for cooking. However, for best results, it is advisable to wait for an additional minute or two before adding your prepared sandwich. This minor delay helps to ensure optimal heat distribution and guarantees that your sandwich is cooked to perfection.
Now that your sandwich maker is fully preheated and your ingredients are ready, you are all set to begin assembling and cooking your sandwich. Remember to follow the manufacturer’s instructions for sandwich assembly and cooking times to achieve the best results with your sandwich maker.
By taking the time to preheat your sandwich maker properly, you are setting yourself up for sandwich success. With a well-preheated sandwich maker, you can expect golden-brown exteriors, warm and melty fillings, and a satisfyingly crisp texture. Enjoy your culinary creations with confidence!
Assembling the Sandwich
Creating a delicious sandwich in a sandwich maker involves a step-by-step process of layering various ingredients to achieve a perfect balance of flavors and textures. By carefully selecting and arranging the fillings, you can elevate an ordinary sandwich into a culinary masterpiece.

1. Choosing the Bread: Start by selecting a type of bread that complements your preferred filling. Whether it’s a crusty baguette, a soft brioche bun, or a hearty whole wheat loaf, the choice of bread sets the foundation for your sandwich masterpiece.
2. Spreading the Sauce: Spread a thin layer of your favorite sauce or condiment on one or both slices of bread. Options include tangy mayonnaise, spicy mustard, zesty pesto, or creamy spreads like hummus or avocado mash. The sauce enhances the overall flavor profile of the sandwich and adds moisture to prevent it from becoming dry.
3. Adding the Protein: Choose your protein source and place it on top of the sauce. This could be thinly sliced deli meats such as turkey, ham, or roast beef, or vegetarian options like tofu, grilled vegetables, or falafel. The protein component adds substance and texture to the sandwich.
4. Layering the Fillings: Arrange an assortment of flavorful fillings on top of the protein. Consider adding crispy lettuce, juicy tomatoes, crunchy cucumbers, sliced onions, pickles, or aromatic herbs like basil or cilantro. These ingredients not only provide a burst of freshness but also contribute to the overall visual appeal of the sandwich.
5. Enhancing with Cheese: If desired, add a slice of your favorite cheese on top of the fillings. Whether it’s gooey melted cheddar, creamy mozzarella, or tangy Swiss, the cheese not only adds richness and depth of flavor but also helps bind the ingredients together.
6. Topping it Off: Complete your sandwich creation with a final layer or spread of sauce on the remaining slice of bread. This additional layer helps hold the sandwich together and ensures each bite is packed with flavor.
Now that your sandwich is perfectly assembled, it is ready to be cooked in the sandwich maker. Follow the instructions provided by the manufacturer to achieve a golden brown, crispy exterior and a warm, gooey interior. Be creative with your ingredient choices, and don’t hesitate to experiment with different combinations to create your own signature sandwich masterpiece!
Placing the Sandwich in the Appliance
Ensuring proper sandwich placement is an essential step in effectively utilizing the sandwich-making apparatus. This section guides users on the correct procedure to position their delectable creations inside the appliance, maximizing the sandwich-making experience.
- Prepare the sandwich by choosing an assortment of desired ingredients, such as freshly sliced vegetables, succulent deli meats, and flavorful spreads.
- Take one slice of bread and lay it flat on a clean surface, followed by layering the chosen ingredients on top, keeping in mind the desired taste and texture.
- Select another slice of bread and carefully place it on top, aligning the edges to create a sandwich.
- Hold the sandwich firmly to prevent any fillings from falling out during the cooking process.
- Gently open the sandwich maker, taking note of the hot surfaces, and place the sandwich onto the lower plate, perfectly positioning it within the allocated sandwich-sized space.
- Close the lid securely, ensuring a snug fit to avoid any leakage or spillage.
- Allow the sandwich to cook for the recommended time specified in the appliance’s user manual or the desired level of crispness and warmth.
- While the sandwich cooks, refrain from opening the device prematurely, as this may disrupt the cooking process and result in an undercooked sandwich.
- Once the cooking time is complete, carefully open the appliance, using oven mitts or other protective gear if necessary, and remove the sandwich with a spatula or tongs.
- Place the sandwich on a plate or cutting board to cool slightly before serving, as the internal fillings may be piping hot.
Following these guidelines ensures that the sandwich is appropriately positioned within the sandwich maker, allowing for even cooking and an enjoyable sandwich-eating experience. By carefully placing the sandwich within the device, users can savor the delicious outcome of their culinary creation.
Removing the Sandwich and Cleaning the Sandwich Maker
In this section, we will discuss the process of taking out the prepared sandwich from the sandwich maker and the subsequent cleaning of the appliance. Proper handling and maintenance are essential to ensure the longevity and hygiene of the sandwich maker.
Removing the Sandwich:
After the sandwich is cooked to perfection, it is time to carefully extract it from the sandwich maker. Make sure to use oven mitts or heat-resistant gloves to protect your hands from the hot surfaces. Open the sandwich maker using the designated handle or latch and gently lift the top plate away from the bottom plate.
To prevent any possible damage, slide a flat spatula or a sandwich lifter underneath the sandwich to gently lift it off the heating plates. Avoid using sharp objects that may scratch or damage the non-stick coating.
Note: Be cautious as the sandwich and sandwich maker can still be hot. Allow them to cool down before proceeding with cleaning.
Cleaning the Sandwich Maker:
It is important to clean the sandwich maker after each use to remove any food residue and maintain optimal hygiene. Start by unplugging the sandwich maker and ensuring that it has cooled down completely to avoid any risk of burns.
Using a damp cloth or sponge, wipe the exterior of the sandwich maker to remove any grease or food particles. For the interior plates, carefully detach them according to the manufacturer’s instructions, if applicable. Rinse the plates with warm soapy water, but avoid submerging the entire sandwich maker in water.
For non-removable or non-detachable plates, use a soft-bristled brush or a damp cloth to gently scrub away any remaining food particles. Wipe the plates dry with a clean cloth or allow them to air dry.
Note: Always follow the specific cleaning instructions provided by the manufacturer for your particular sandwich maker model.
By following these simple steps, you can ensure proper removal of the sandwich from the maker and maintain cleanliness for your sandwich maker, extending its lifespan and ensuring optimal performance for delicious sandwiches every time.


