Have you ever wanted to add a burst of flavor to your favorite dishes without overpowering the other ingredients? Look no further than the revolutionary kitchen tool known as a garlic roaster. This must-have gadget takes the pungent cloves of garlic and transforms them into a fragrant, mellow delight that will elevate your culinary creations to new heights.
Unlock the Hidden Delights
Roasting garlic enhances its natural sweetness and mellows out the harsh bite, making it a versatile addition to a wide range of recipes. No matter if you’re preparing a hearty pasta sauce, hearty roasted vegetables, or savory soups, this little gem will bring a depth of flavor that will have everyone asking for seconds.
Experience the Magic
But how does a garlic roaster work its magic? Its clever design allows the garlic to slowly roast, while keeping it perfectly moist and tender. As the cloves heat up, their natural sugars caramelize, creating a rich, nutty taste that will tantalize your taste buds. Plus, roasting the garlic also softens the cloves, making them easy to spread or mash, adding a luxurious texture to your dishes.
Mastering the Art of Roasting Garlic: An Essential Guide for Beginners
Discovering the art of roasting garlic is an exciting journey for any cooking enthusiast. This beginner’s guide will equip you with the knowledge and techniques needed to unlock the rich and complex flavors that roasted garlic offers. In this guide, we will explore the process of utilizing a specialized device called a garlic roaster to effortlessly achieve perfectly roasted garlic every time.
1. Preparing the Garlic Bulbs
Before diving into the roasting process, it is crucial to select high-quality garlic bulbs. Opt for firm bulbs with unblemished cloves that are tightly packed together. Once you have chosen your garlic bulbs, separate them into individual cloves, ensuring their protective layers remain intact. This step is essential to guarantee even roasting and ensure the natural flavors are preserved.
2. Seasoning and Preparing the Roaster
Enhance the flavors of your roasted garlic by adding a touch of seasoning. Gently toss the separated garlic cloves with a drizzle of olive oil, a sprinkle of salt, and a pinch of black pepper. To prepare the roaster, lightly grease its interior with olive oil or a non-stick cooking spray. This process will prevent the garlic cloves from sticking to the roaster and allow for easy removal after roasting.
3. Arranging the Garlic Cloves
Place the seasoned garlic cloves in the roaster, ensuring they are evenly spread out for consistent roasting. Remember to handle the cloves gently to avoid any damage to their delicate texture. Placing the cloves upright or on their sides will allow for even heat distribution and help achieve a uniform level of roasting throughout.
4. Roasting Time and Temperature
Now that your garlic cloves are neatly arranged in the roaster, it’s time to determine the optimal roasting time and temperature. Preheat your oven to a moderate temperature, generally around 350°F (175°C). The garlic cloves will require approximately 30-45 minutes to roast to perfection, depending on their size and your desired level of caramelization. Keep a close eye on the cloves to avoid overcooking, as this may result in bitterness.
5. Checking for Roasting Completion
To ensure your garlic cloves are adequately roasted, be mindful of their appearance and texture. Once the cloves have developed a golden-brown color and feel soft when gently squeezed, they are likely ready to be removed from the oven. Remember that slightly under-roasted garlic may still possess a strong, pungent flavor, while over-roasted cloves may taste bitter.
6. Enjoying the Roasted Garlic
Once you have removed the roasted garlic from the oven, allow it to cool slightly before handling. Gently squeeze the cloves from their skins, revealing their creamy, caramelized interior. The roasted garlic can be used in an array of culinary creations, including spreads, pastes, dressings, and even enjoyed as a standalone delicacy. Its intensified, sweet flavor will undoubtedly elevate any dish it graces, so don’t hesitate to experiment and savor the aromatic world of roasted garlic!
Remember, mastering the art of using a garlic roaster requires patience, attention, and a willingness to indulge in the remarkable flavors that roasted garlic offers. With this beginner’s guide, you are well-equipped to embark on this culinary journey and create mouthwatering dishes that will impress family and friends.
Understanding the Key Factors in Choosing the Perfect Garlic Roaster for Your Kitchen
In this section, we will explore the essential aspects to consider when selecting the ideal garlic roaster for your kitchen. In order to enhance your cooking experience and elevate the flavor profiles of your dishes, it is crucial to find the right garlic roaster that caters to your specific requirements and preferences.
1. Material
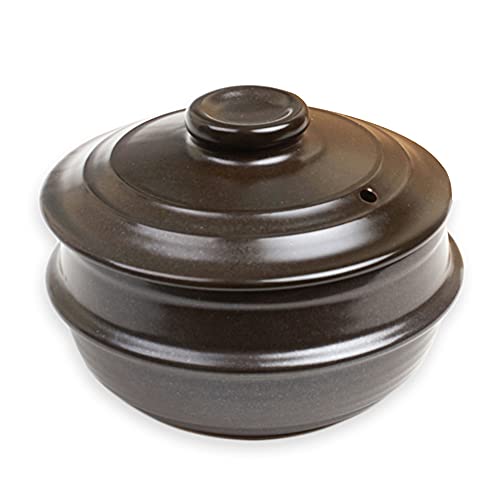
The material of the garlic roaster plays a significant role in its performance and durability. Different materials, such as ceramic, clay, or stainless steel, offer varying benefits. Each material has its unique heat retention properties and conducts heat differently, resulting in distinct outcomes when roasting garlic. Consider your cooking style and desired results when choosing the material for your garlic roaster.
2. Size and Capacity
Another crucial factor to contemplate while choosing a garlic roaster is its size and capacity. The size of the roaster determines how many garlic bulbs can be roasted at once. If you often cook for large gatherings, you may opt for a larger roaster to accommodate more garlic bulbs. Conversely, if you have limited kitchen space or cook in smaller portions, a compact-sized roaster would be more suitable.
| Material | Benefits |
|---|---|
| Ceramic | Retains heat evenly for consistent roasting; offers aesthetic appeal |
| Clay | Imparts a distinct earthy flavor to roasted garlic; retains moisture |
| Stainless Steel | Durable, easy to clean, and conducts heat efficiently |
Preparing the Garlic for Roasting
In the process of preparing garlic for roasting, several important steps need to be taken to ensure the desired outcome. By carefully selecting the garlic bulbs, peeling them, and preparing them for roasting, you can enhance their flavor and achieve a delightful caramelized texture that will elevate any dish they are used in.
Selecting the Garlic Bulbs
When choosing the garlic bulbs for roasting, it is crucial to select ones that are firm and plump. Avoid any bulbs that feel soft or have visible signs of mold. Look for garlic bulbs with a tightly wrapped skin, as this indicates freshness. The quality of the garlic bulbs will greatly influence the final result, so choose wisely.
Peeling the Garlic
To prepare the garlic for roasting, you will need to peel the individual cloves. Begin by separating the cloves from the bulb, and then using the side of a chef’s knife, gently crush each clove to loosen the skin. The skin can then be easily peeled away, revealing the tender garlic clove. Be careful not to crush the cloves too forcefully, as this may alter their taste and texture.
Pro tip: To speed up the peeling process, you can place the cloves in a bowl of hot water for a few minutes. This will help loosen the skin, making it easier to remove.
Once the cloves are peeled, take care to remove any green shoots or blemishes, as they can contribute a bitter taste to the roasted garlic.
Remember: The quality and freshness of the garlic cloves, as well as the careful removal of the skin and any unwanted parts, are essential factors in achieving a delicious roasted garlic flavor.
Roasting Garlic: Step-by-Step Instructions
In this section, we will guide you through the process of roasting garlic using a specialized cooking tool designed specifically for this purpose. Roasting garlic enhances its flavors, making it sweeter and milder, and provides a soft and spreadable texture that can be used in a variety of delicious recipes.
To begin, first, ensure that your garlic roaster is clean and dry. This will help prevent any unwanted flavors or odors from affecting the taste of the roasted garlic. Next, take a whole head of garlic and carefully remove the loose outer layers, leaving the skin intact to protect the individual cloves.
Preheat your oven to the recommended temperature as stated in the instructions of your garlic roaster. While the oven is preheating, you can also choose to drizzle some olive oil over the garlic head, as this will add extra richness to the roasted cloves. Place the prepared garlic head onto the roasting rack, ensuring that it sits securely.
Once the oven has reached the desired temperature, carefully place the garlic roaster with the garlic head inside. The enclosed design of the roaster helps to retain heat and steam, allowing the garlic to roast evenly. Set the timer according to the recommended cooking time, typically ranging from 30-45 minutes, depending on your desired level of caramelization and softness.
After the timer goes off, carefully remove the garlic roaster from the oven. Be cautious as both the roaster and garlic will be hot. Allow the roasted garlic to cool for a few minutes before handling. Gently squeeze the base of the garlic head or use a fork to extract the soft, roasted cloves from their skin.
Once the cloves have been removed, they can be used immediately in your favorite recipes or stored for future use. Roasted garlic adds depth and complexity to a variety of dishes, such as spreads, sauces, soups, and roasted vegetables. Its creamy texture and mild flavor make it a versatile ingredient that can elevate your culinary creations.
Remember to clean your garlic roaster thoroughly after each use to ensure its longevity and prevent any residual flavors from transferring to subsequent batches of roasted garlic. With these step-by-step instructions, you can confidently enjoy the rich flavors and aroma of freshly roasted garlic in your culinary explorations.